
Schedule recurring reports
Availability: Report Scheduler is available in GMS 3.1.1 beta 3 and later. The current release schedules customer Transactions reports. Additional report types may be added later.
Use Report Scheduler to generate recurring reports and email them automatically. Schedules belong to the selected customer and can deliver PDF, Excel (XLSX), or CSV files.
Open Report Scheduler
- Select the required Customer.
- Select Report Scheduler.
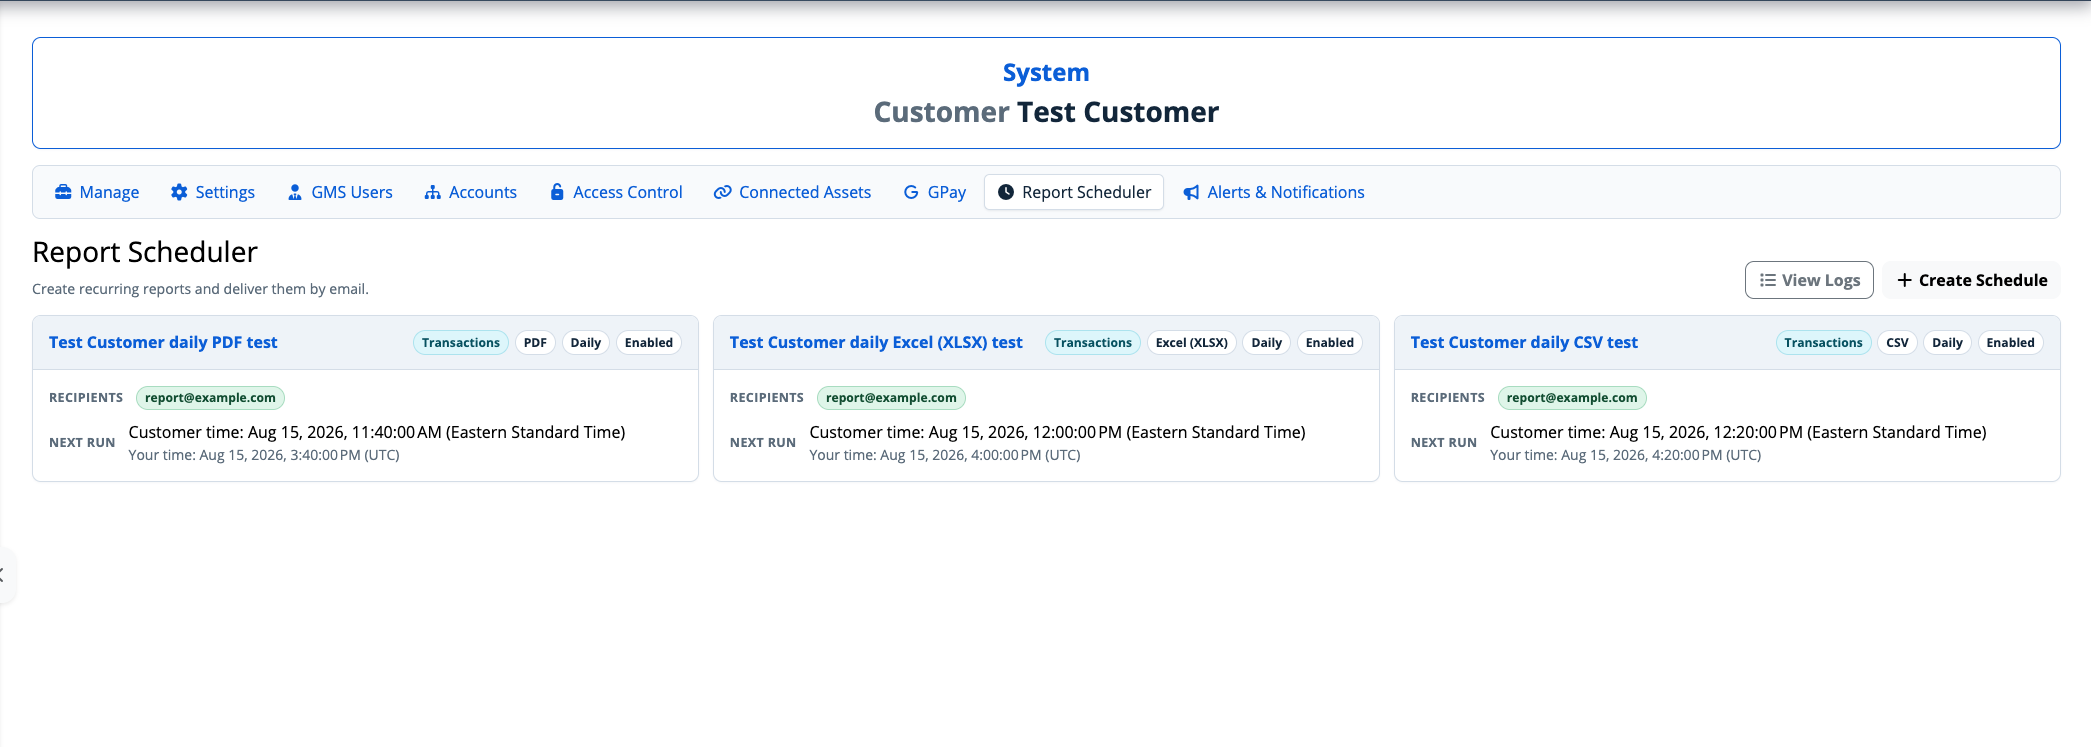
Schedule cards show the report, format, frequency, recipients, and next run.
Create a schedule
- Select Create Schedule.
- Enter a description that identifies the schedule.
- Select the report, output format, and frequency.
- For a weekly schedule, choose Monday–Sunday or Sunday–Saturday.
- Select the delivery time. GMS interprets this time in the customer time zone shown below the field.
- Leave Enabled selected to begin running the schedule.
- Enter at least one recipient email address. Use Add another email address for additional recipients.
- Select Add.
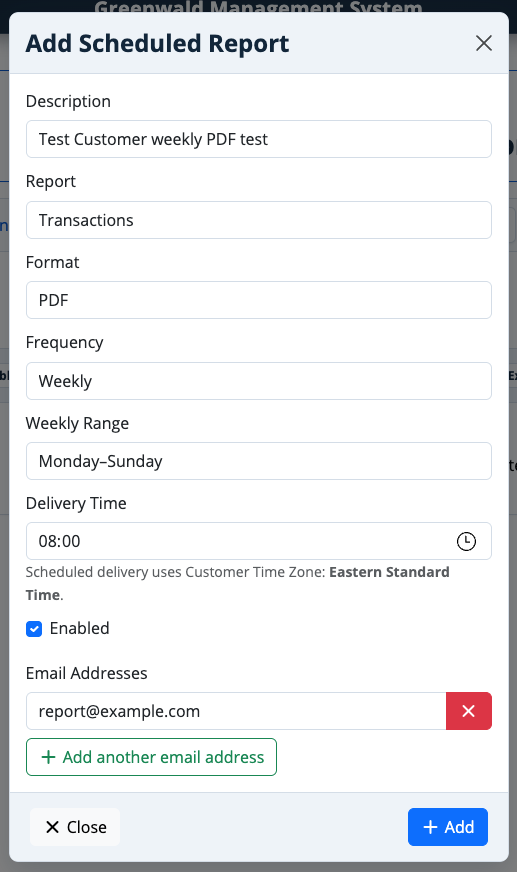
Create a schedule and confirm the customer time zone before saving.
Choose the reporting period
- Daily — runs every day and reports the previous calendar day.
- Weekly — runs on the first day of the selected weekly range and reports the previous completed seven-day range.
- Monthly — runs on the first day of each month and reports the previous calendar month.
A schedule requires between 1 and 20 valid recipient email addresses.
Understand time zones
Scheduled delivery always uses the customer time zone configured in Customer Settings. The schedule card shows the next run in customer time. When your profile time zone differs, the card also shows Your time.
Report Scheduler Runs always displays historic run times in your user-profile time zone.
Edit, disable, or delete a schedule
- Select the schedule description on its card.
- Change the fields and select Save, clear Enabled to retain the schedule without running it, or select Delete to remove it.
Review run history
- Select View Logs.
- Review the run date, report, format, covered period, recipients, status, and any error.
- Select Report Scheduler to return to the schedule list.
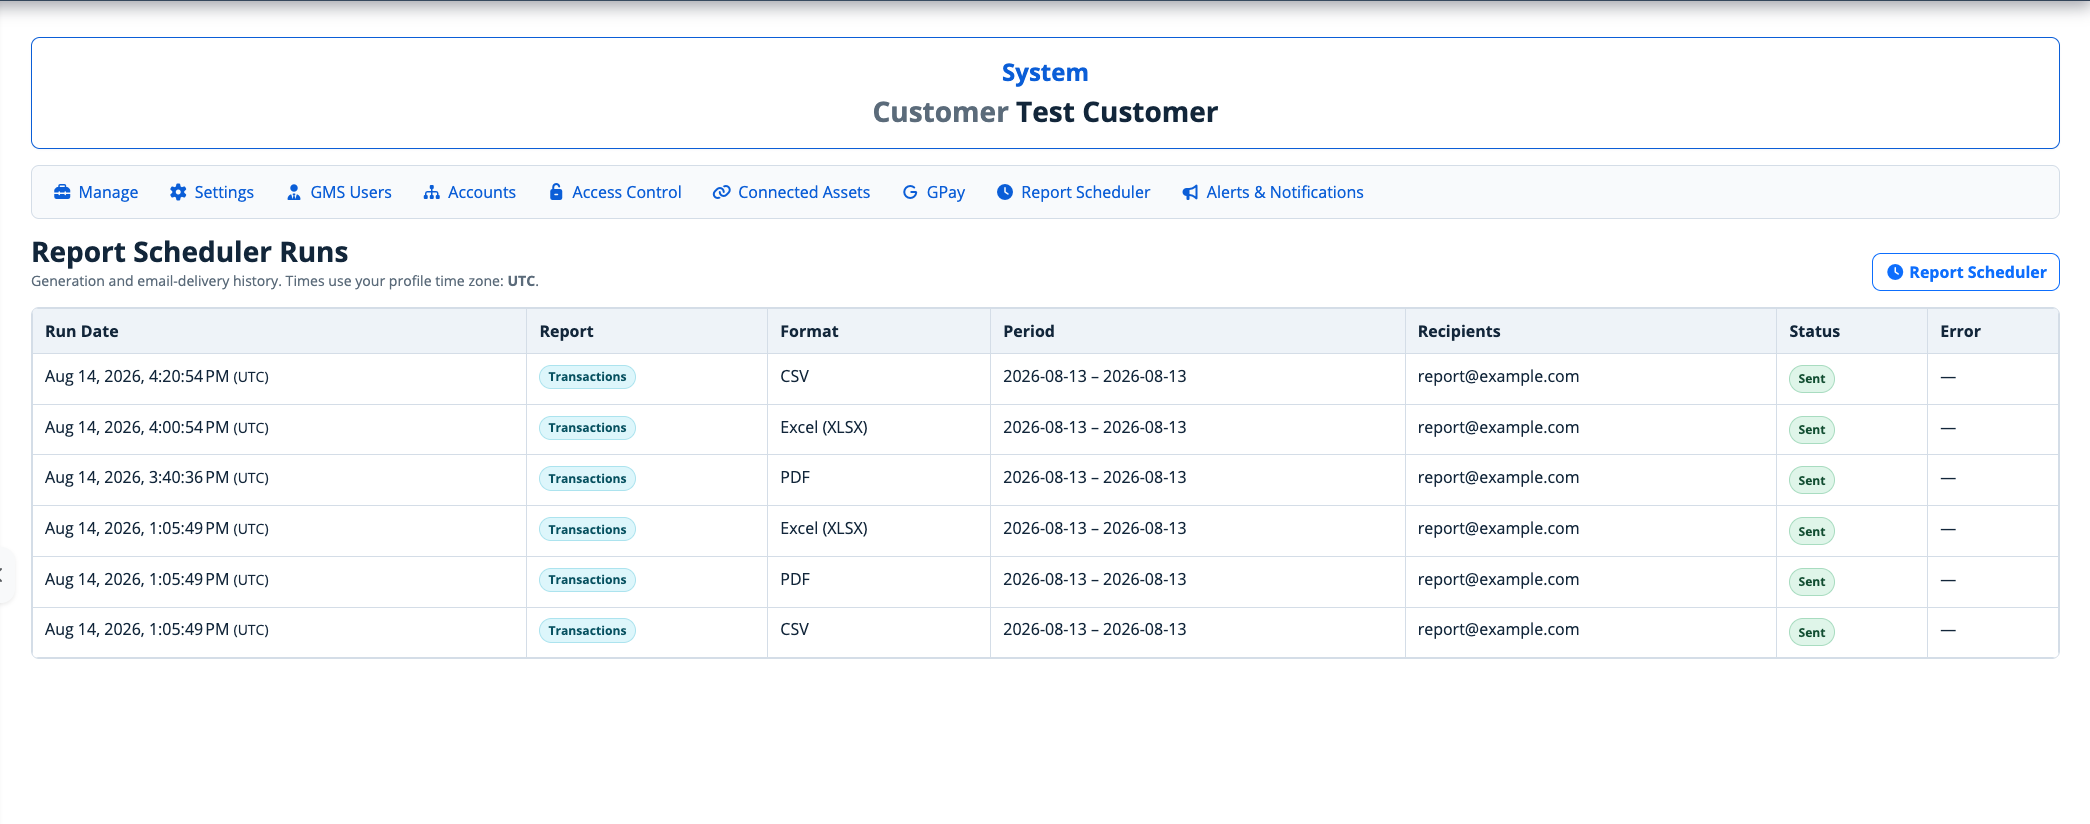
Run history shows generation and email-delivery results in the user-profile time zone.
Troubleshooting
- Report Scheduler is not visible — ask an administrator to grant the Report Scheduler permission. See the Permission catalog.
- A report did not arrive — confirm the schedule is enabled and the recipient address is correct, then check View Logs for status and error details.
- The delivery time looks different — compare the customer time zone with the time zone configured in your user profile.
- No run appears yet — run history is created after the first scheduled occurrence.
For information about reports that can be generated manually, see Understand account and location reports.