
Greenwald Pay GMS Quick Start Guide (2021)
Use Greenwald Management System (GMS) to configure users, accounts, locations, machine profiles, devices, collections, and reports.
- Guide date: July 9, 2021
- Supported browsers in the guide: Google Chrome, Firefox, and Microsoft Edge
Sign in
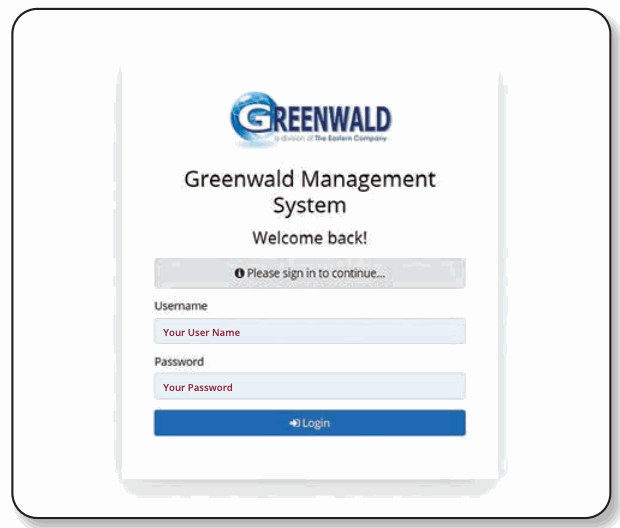
- Open GMS.
- Enter your GMS username and password.
- If you do not have access, call Greenwald Customer Service at 800-221-0982.
Add a system user
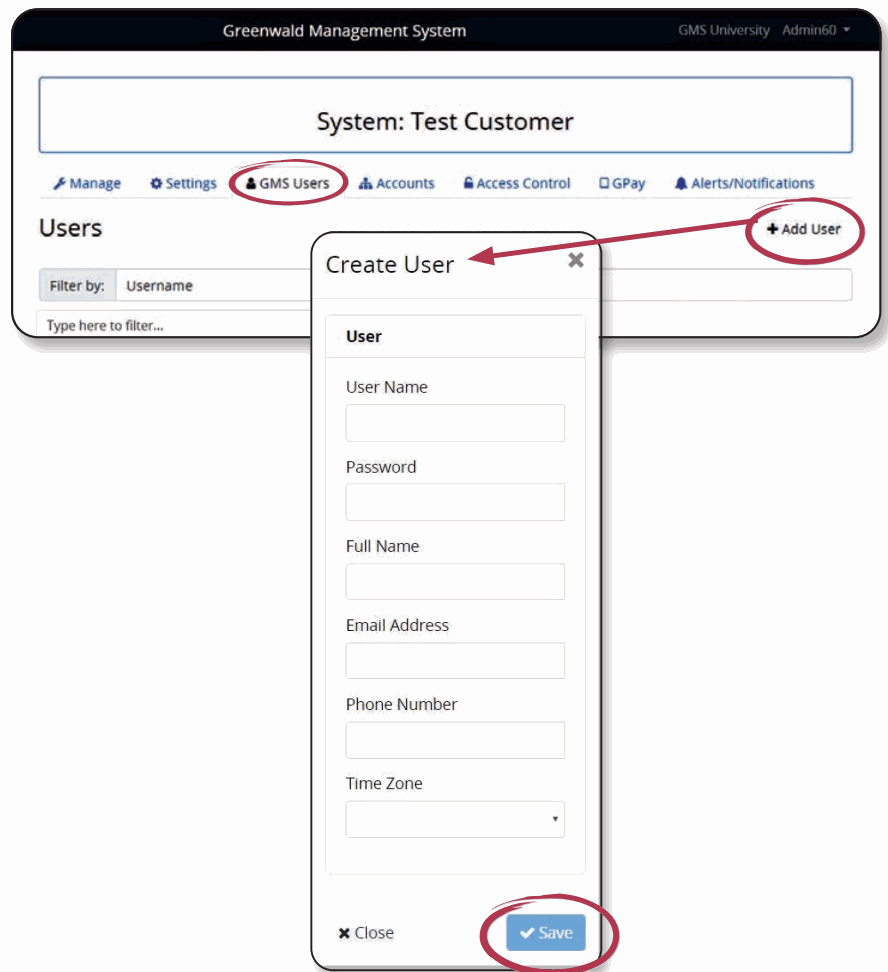
- At system level, select Users.
- Select Add User.
- Enter the user information.
- Select Save.
Configure system settings
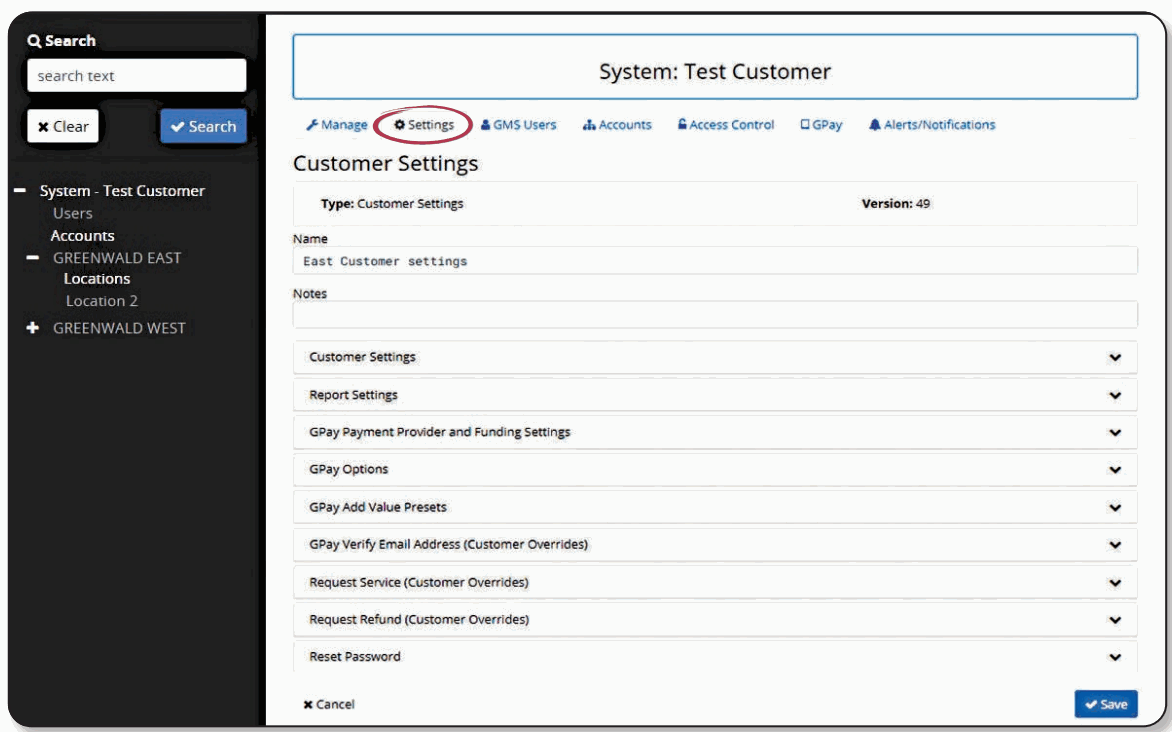
- At system level, select Settings.
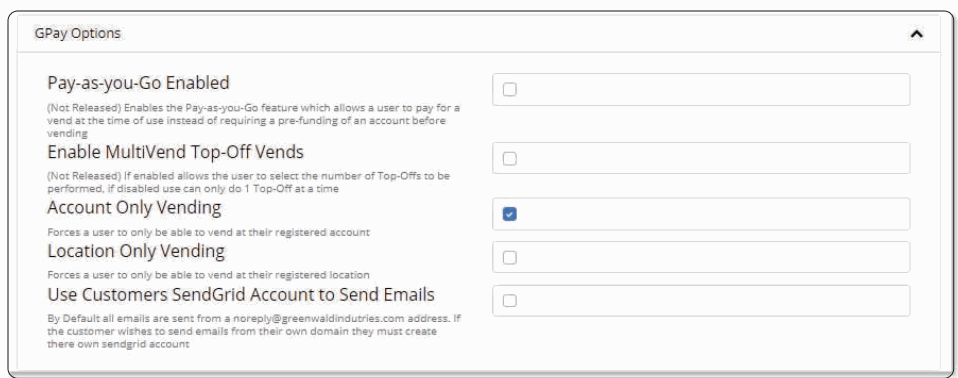
- Expand each setting and choose the required values.
- Select Save.
System settings affect every account. Options include machine-number display, payment-provider configuration, GPay behavior, preset values, and customer email templates.
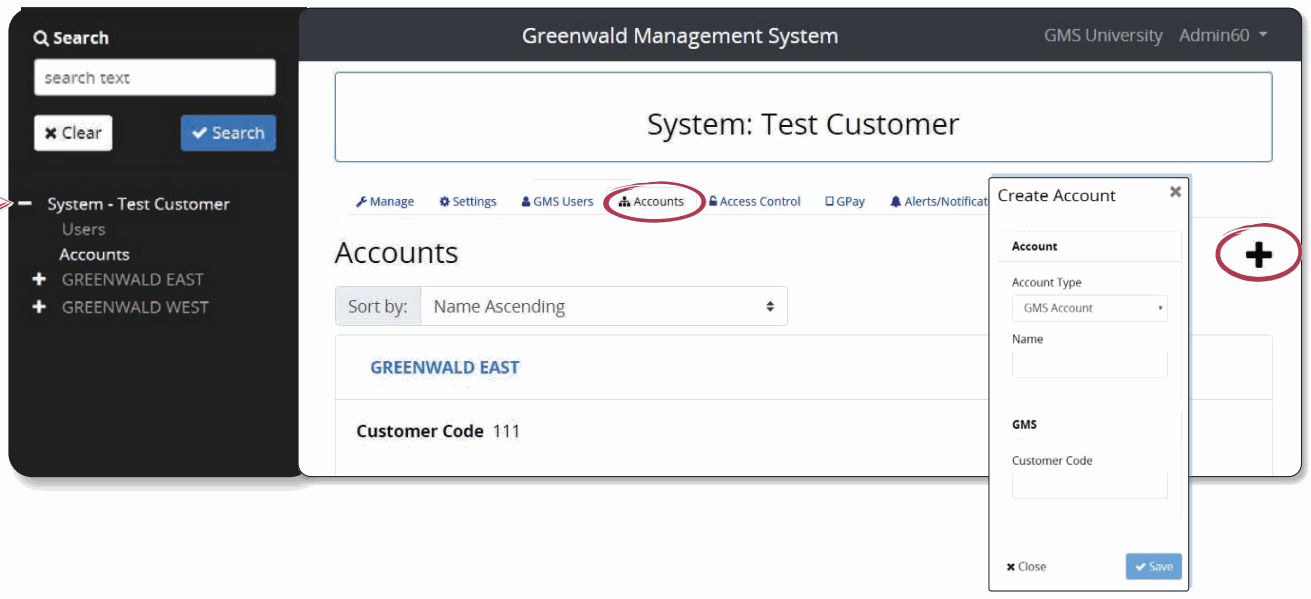
Add an account
- At system level, select Accounts.
- Select the plus sign.
- Enter the account information and Greenwald-provided Customer Code.
- Select Save.
Configure account settings
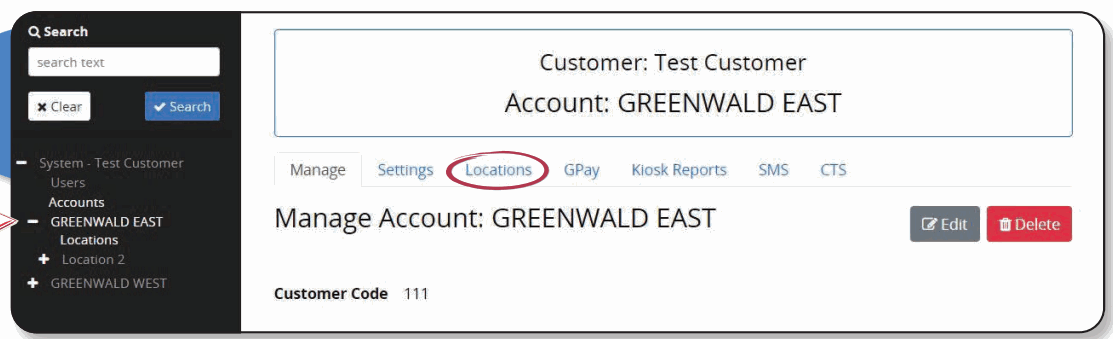
- Select the account in the navigation panel.
- Select Settings.
- Expand each setting and make the required selections.
- Select Save.
These settings apply to every location in the account. Account options include the initial app message and Auto Reload Plan for owner operating funds.
Add a location
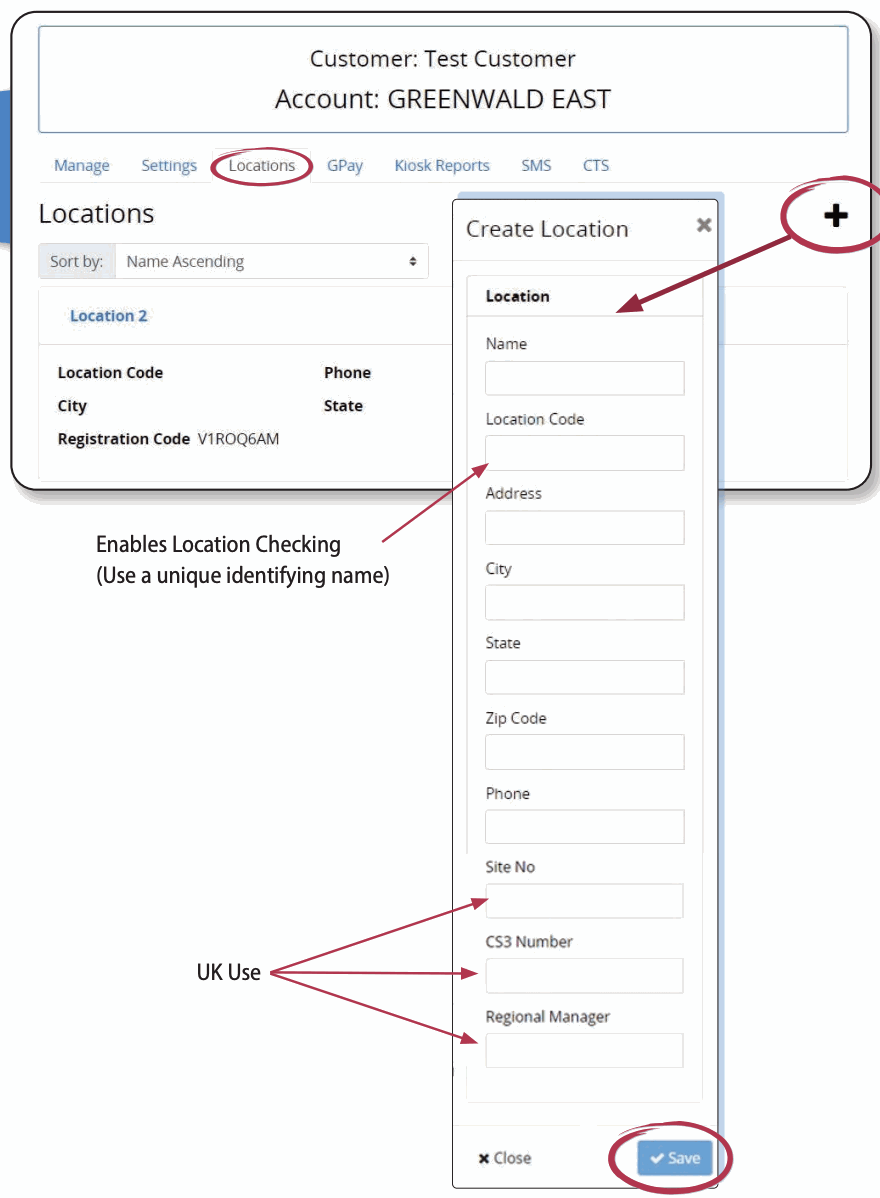
- Select the account that will own the location.
- Select Locations.
- Select the plus sign.
- Enter the location information. Use a unique Location Checking name when that feature is enabled.
- Select Save.
Add a Greenwald Pay mobile user
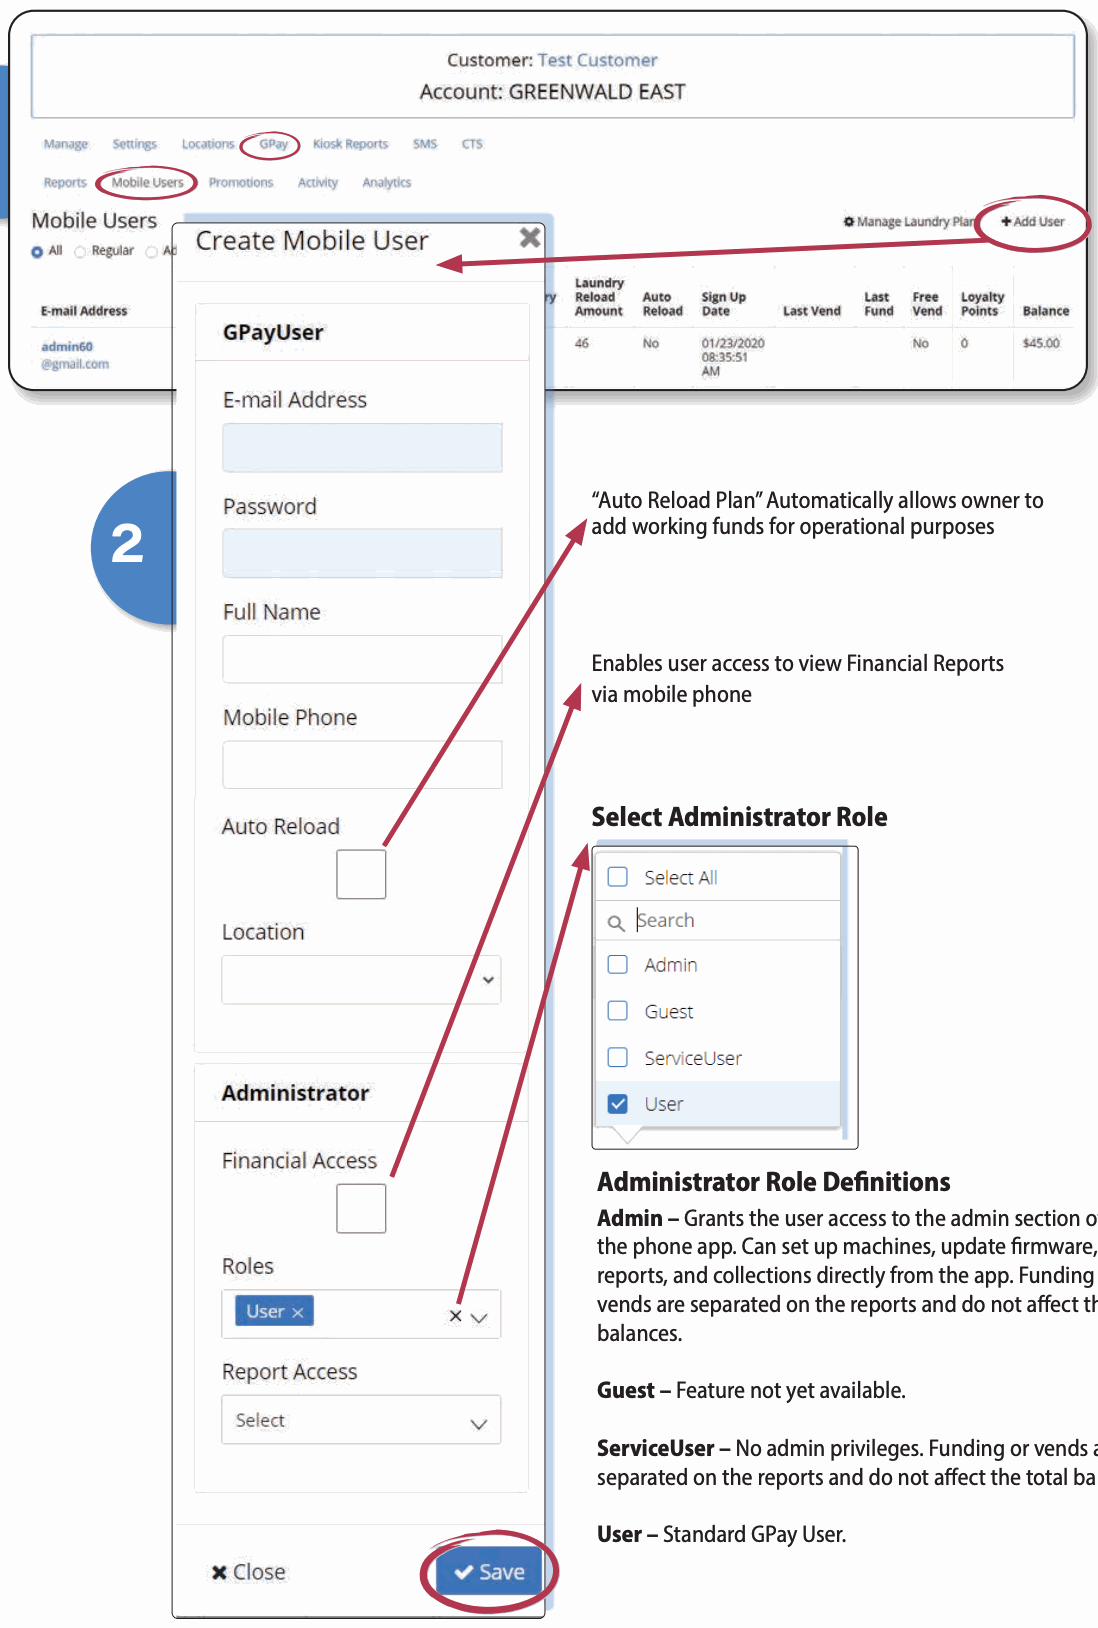
- Select the location.
- Select GPay, then Users.
- Select Add User.
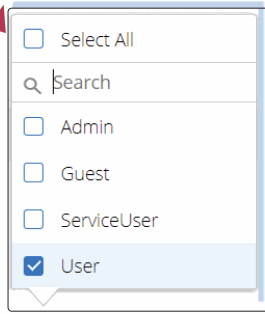
- Enter the user details and choose an administrator role.
- Select Save.
Roles:
- Admin: Access to the app's administrator area; can set up machines, update firmware, run reports, and run collections. Administrator funding and vends remain separate in reports and do not affect total balances.
- Guest: Feature unavailable in the source guide.
- ServiceUser: No administrator privileges. Funding and vends remain separate in reports and do not affect total balances.
- User: Standard Greenwald Pay user.
Set promotions
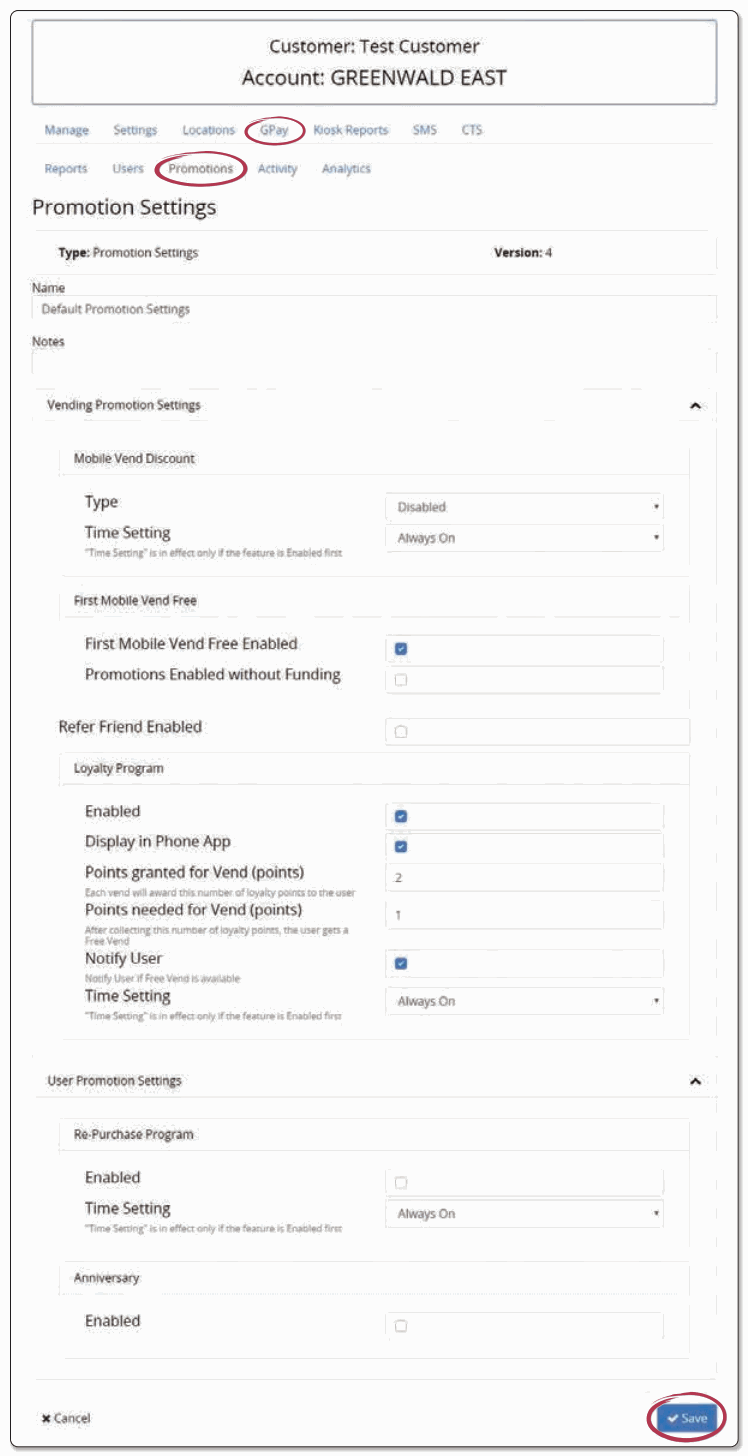
Before configuring promotions, a system administrator must enable the feature and activate Promotions Read.
- Select the account.
- Select GPay, then Promotions.
- Adjust the promotions.
- Select Save.
Promotion settings must be configured separately for each account.
Create machine profiles
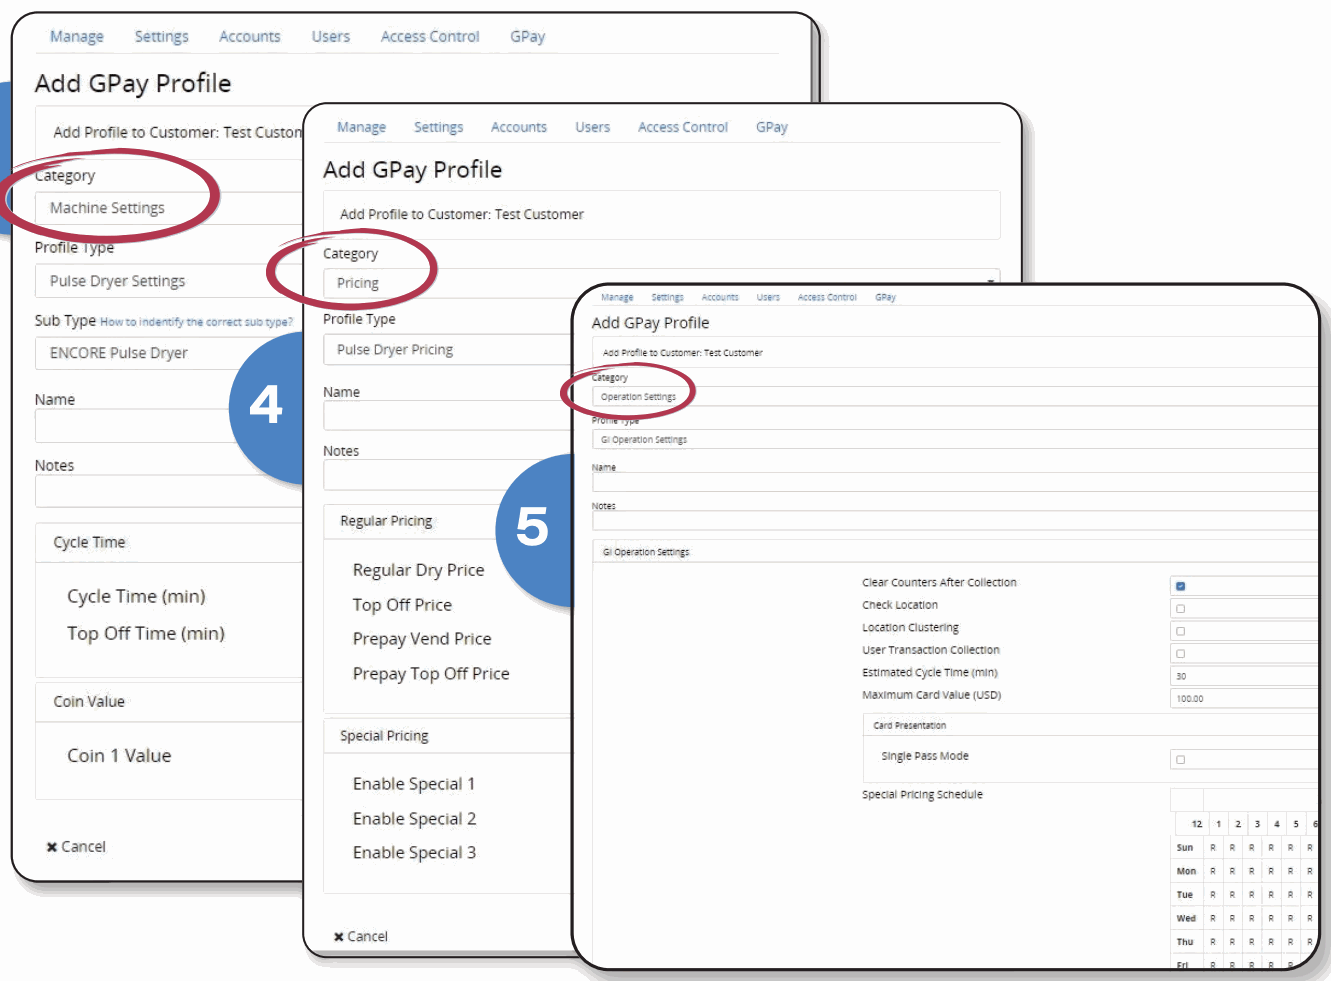
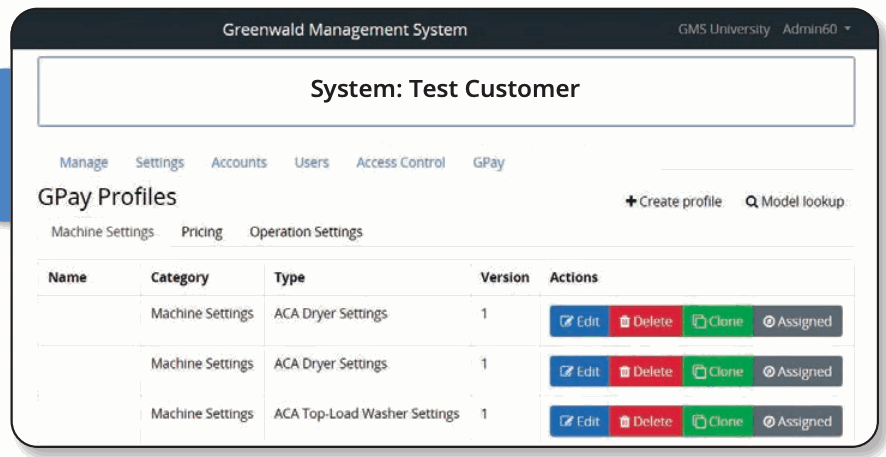
Each machine type needs three profiles: Machine Settings, Pricing, and Operation Settings.
- At system level, select GPay, then Profiles.
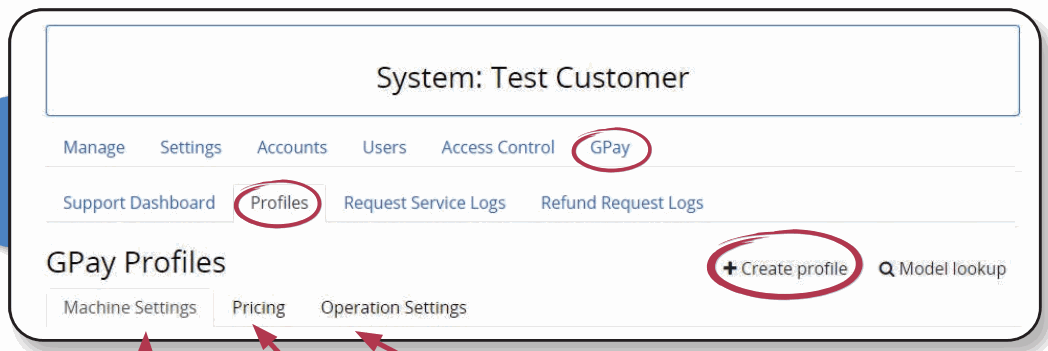
- Open each of the three profile tabs.
- Select the profile type and, when available, the subtype.
- Enter a unique profile name.
- Adjust the settings and select Save.
- For Maytag dual-coin machines, set values for both Coin 1 and Coin 2.
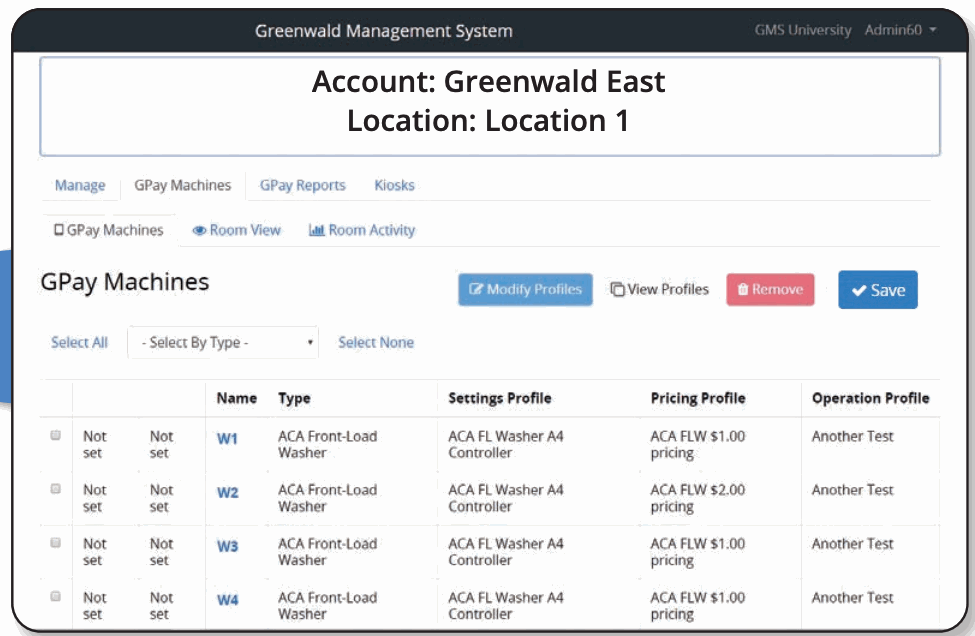
Add machines and assign profiles
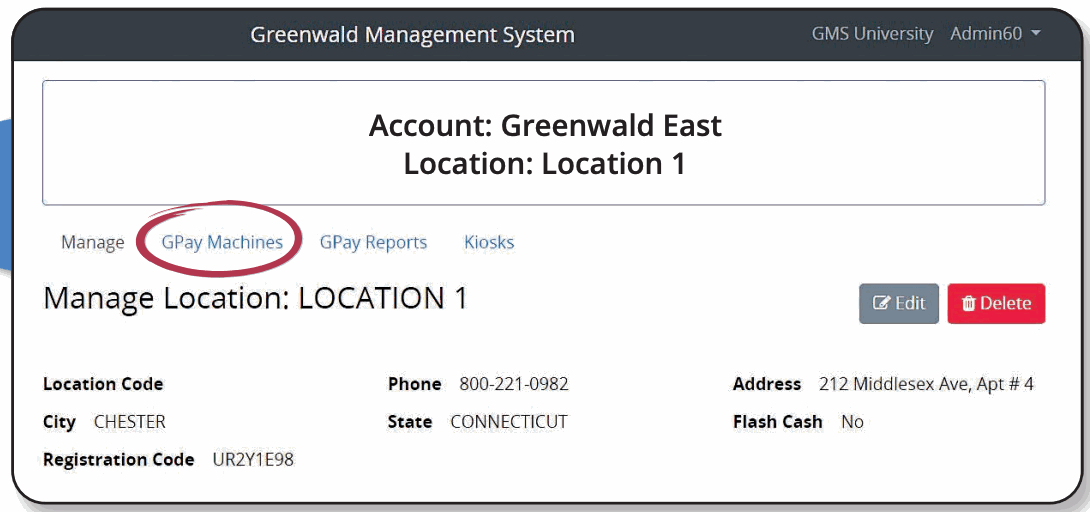
- Select the installation location.
- Select GPay Machines.
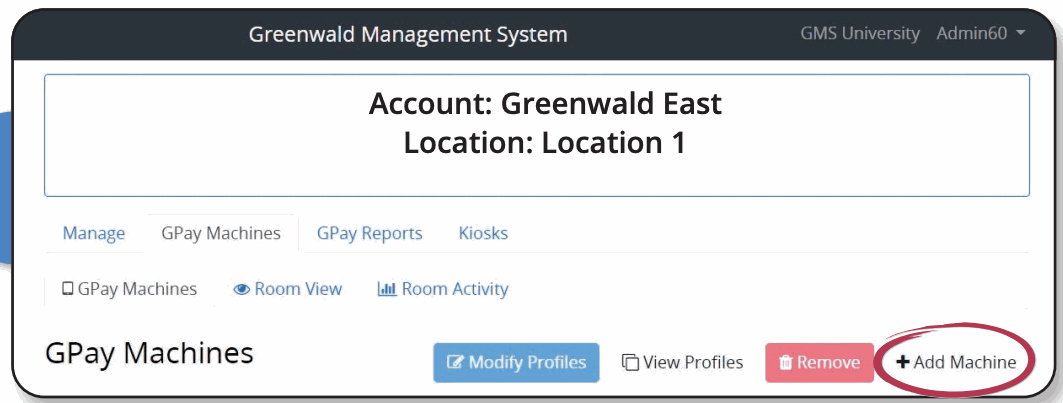
- Select Add Machine.
- Enter the starting washer or dryer number and the number of machines.
- Select the machine type.
- Assign the Machine Settings, Pricing, and Operation profiles.
- Select Add.
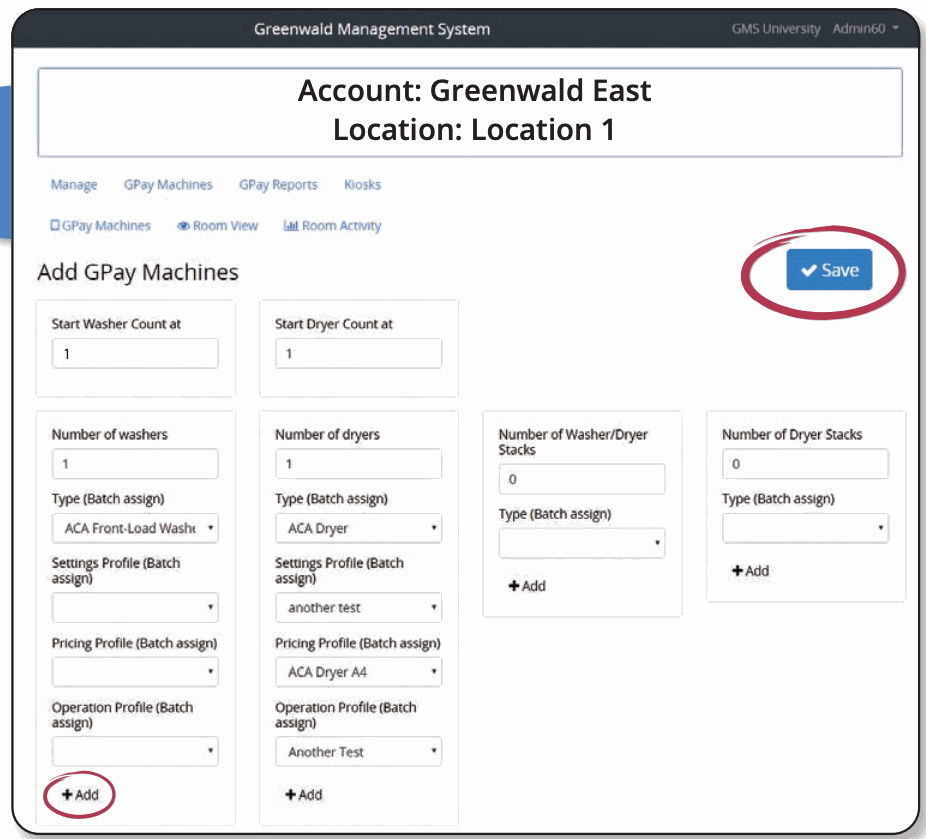
- Repeat for every machine type at the location.
- Select Save at the top of the page.
Pair machines in the laundry room
- In the Greenwald Pay app, sign in with administrator credentials and select Setup.
- Select the correct account and location.
- Select a Greenwald Pay device and match it to its machine profile. For Greenwald Pay Plus, use the setup cards where required.
- Verify the device MAC address and complete pairing.
- Repeat for each machine.
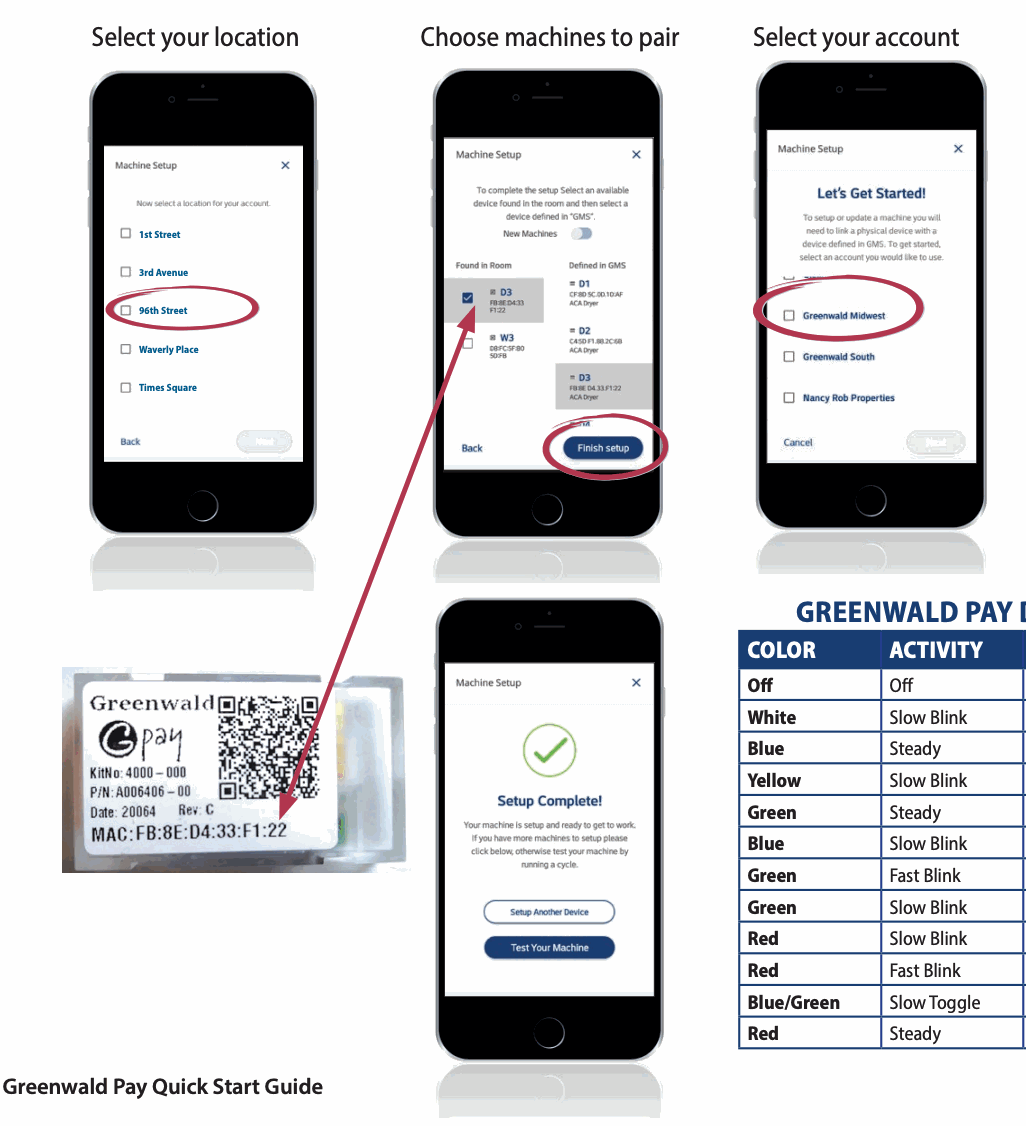
If a machine profile changes in GMS, pair that machine again.
Device LED codes
| Color | Activity | Meaning |
|---|---|---|
| Off | Off | Device not connected to power |
| White | Slow blink | Device not configured |
| Blue | Steady | Selected during configuration |
| Yellow | Slow blink | Loading machine configuration |
| Green | Steady | Configured and ready |
| Blue | Slow blink | Active with phone app |
| Green | Fast blink | Active; Start not pressed |
| Green | Slow blink | Busy; machine running |
| Red | Slow blink | Machine error |
| Red | Fast blink | Machine interface error |
| Blue/Green | Slow toggle | Firmware loading |
| Red | Steady | Firmware error |
In-app administrator functions
Sign in to the Greenwald Pay app with administrator credentials to access setup, firmware, collections, reports, and supported machine controls.
Firmware
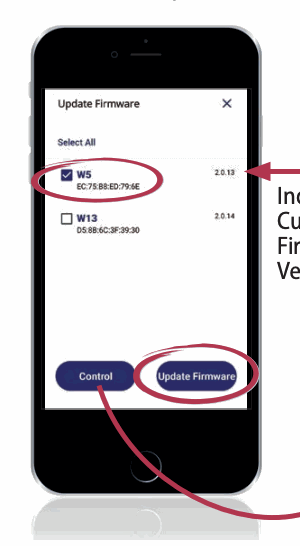
Update firmware only when directed by Greenwald Industries. Call 800-221-0982 to confirm the correct version.
- Select Firmware.
- Select the required version.
- Select Update Firmware.
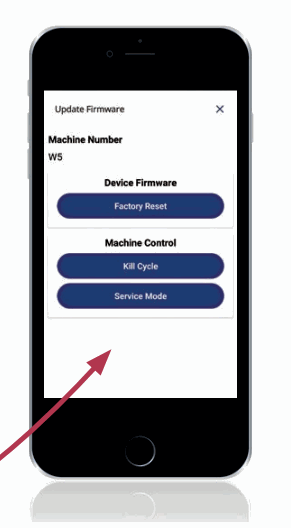
Machine controls shown in the guide include Factory Reset, Kill Cycle for LG, and Service Mode for LG.
Record a coin collection
- In the app, select Collect.
- Select one machine or all machines.
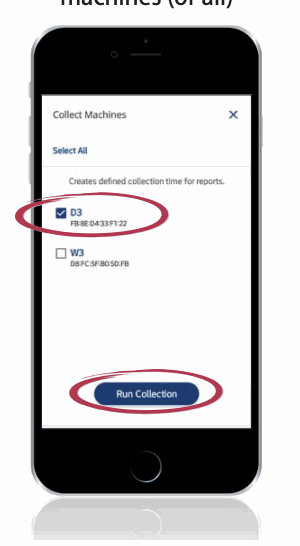
- Run the collection and wait for completion.
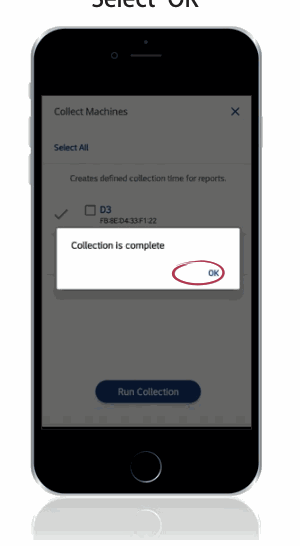
- Open the machines and perform the physical coin collection.
- Run a GMS collection report to see the amount collected.
Run a report in the app
- In the app, select Reports.
- Select the desired report.
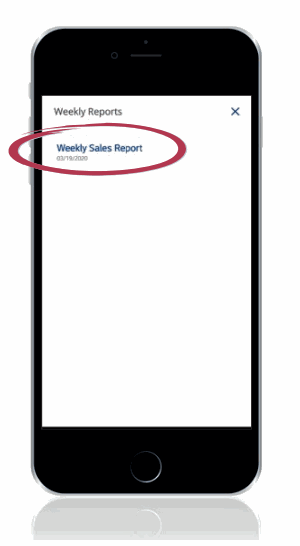
- Wait for the report and open the result.
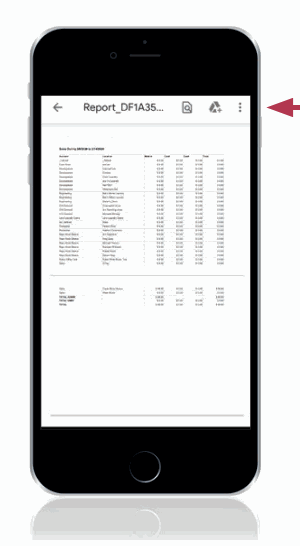
Reports can be viewed, shared, downloaded, printed, searched, and saved.
Run a report in GMS
- Select the account in the navigation panel.
- Select GPay, then Reports.
- Choose the date range and report type.
- Download the generated report.
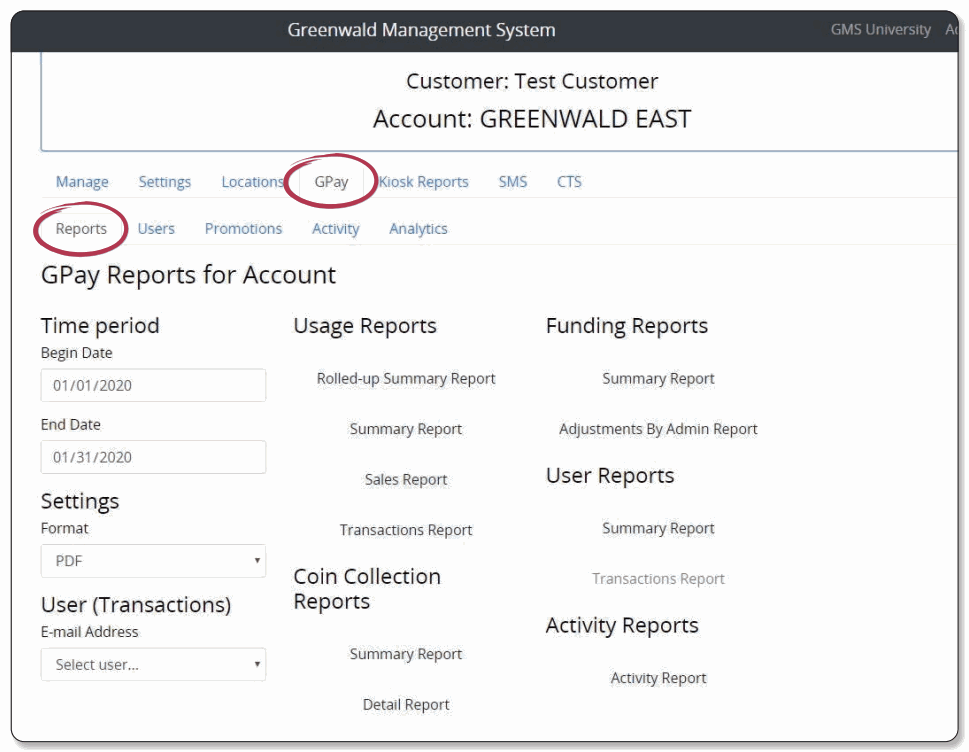
Usage reports
- Account Rolled-Up Summary: Total coin and mobile-pay dollars for each location during the selected period.
- Account Summary: Total coin and mobile-pay dollars for each machine at each location.
- Account Detail: Every account transaction during the selected period.
- Location Rolled-Up Summary: Total coin and mobile-pay dollars for the selected location.
- Location Summary: Total coin and mobile-pay dollars for each machine at the selected location.
Funding reports
- Account Summary: Total funds added by each account user.
- Location Summary: Total funds added by each user at the location.
- Location Individual: Every funding event for one selected user; select the user's email address below the date range.
Coin collection reports
- Account Summary: Timestamp and total amount for each coin collection by machine.
- Account Detail: Timestamp and total for each coin insertion and collection by machine.
- Location Summary: Timestamp and total for each collection on the selected machine.
- Location Detail: Timestamp and total for each coin insertion and collection on the selected machine.
Original guide
Download the Greenwald Pay GMS Quick Start Guide. The same PDF remains attached to this page.