
Install MultiPay Reader on Alliance ACA machines - INS.2487-1 Rev B
Install a MultiPay machine reader on supported Alliance ACA machines, then pair it with the machine definition in GMS.
- Installation sheet: INS. 2487-1 Rev B
- Application: Alliance machines; stack-machine quantities appear in parentheses below
Package contents
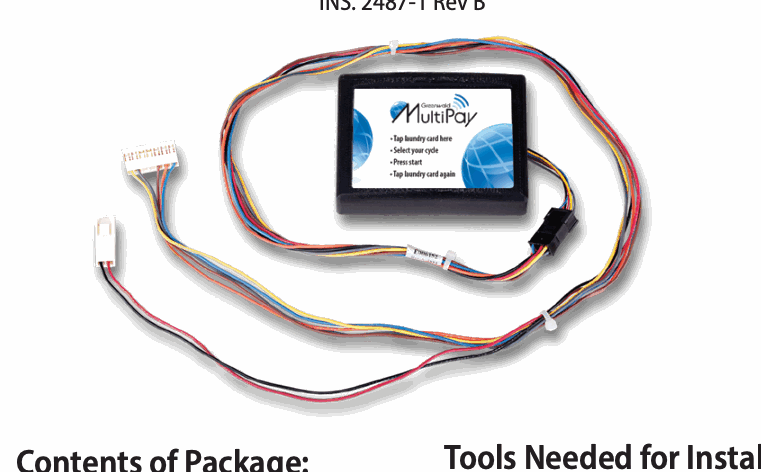
- 1 (2) MultiPay reader assembly
- 2 (4) #6-32 KEPS nuts
- 1 installation instruction sheet
- 1 (2) cover/mounting plate
- 1 (2) interface cable
- 2 (4) #6, 5/8-inch OD fender washers
- 1 (2) money-box cover plate
What you need
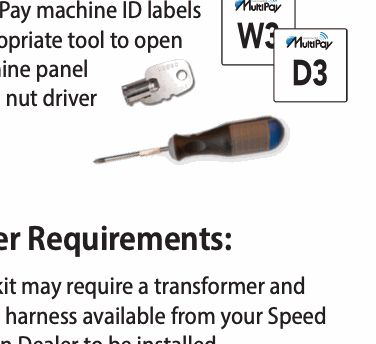
- MultiPay machine ID labels
- Appropriate tool or operator key to open the machine panel
- 5/16-inch nut driver
- A transformer and cable harness from a Speed Queen dealer when required by the machine
Protect electronic components
Reader and interface-board components are static sensitive.
- Keep components in their original packaging until installation.
- Ground yourself to unpainted chassis metal before handling components and repeatedly during installation.
- Use an anti-static wrist strap when available.
- Handle circuit assemblies by their edges; avoid terminals and electronic parts.
- Touch the package to grounded, unpainted metal before removing a component.
Prepare the machine
- Create the room and machine profiles in GMS before installation.
- Disconnect machine power and open the service panels.
- Confirm one supported serial-payment configuration:
- DIP switch 3 is On; or
- the serial/purse jumper is installed; or
- Serial Payment is enabled on an Alliance Quantum Gold Pro machine.
- Change switches only while machine power is off.
Install the reader
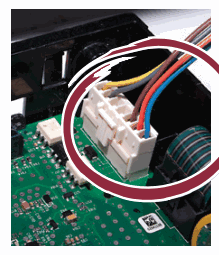
- Connect the interface cable's 7-pin connector to H3 on the control board.
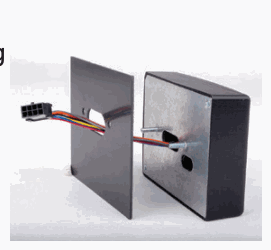
- Feed the reader cable and two PEM studs through the cover/mounting plate and coin-drop opening.
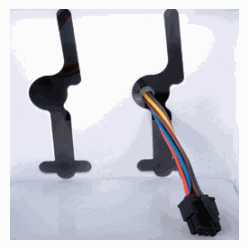
- Record the reader MAC address before securing the reader.
- Secure the reader with the supplied #6-32 KEPS nuts and fender washers.
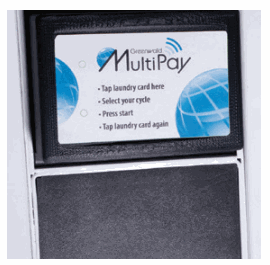
- Connect the reader's 8-pin connector to the interface cable.
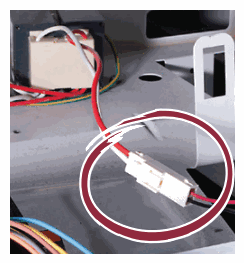
- Connect the 2-pin power connector to the transformer.
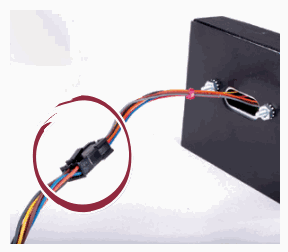
- Close the service panels. If used, press the optional money-box cover plate into the opening until its tabs lock.
- Restore machine power.
Pair the reader
- In the Greenwald Pay app, sign in with administrator credentials and select Setup.
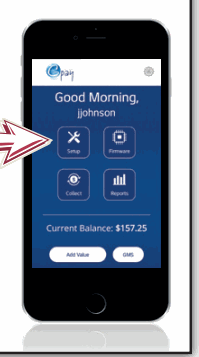
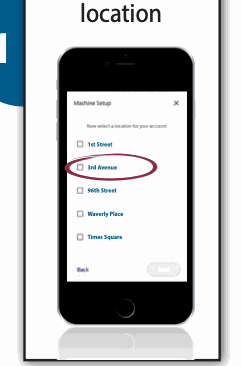
- Select the correct account and location.
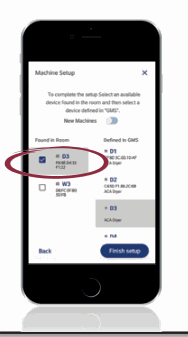
- Select a reader and machine assignment. Confirm that the app MAC address matches the label recorded during installation.
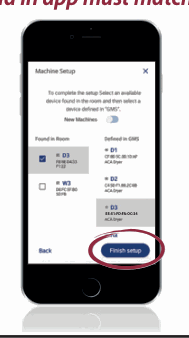
- Finish setup, then label the washer or dryer with its machine number.
- Repeat until every machine is paired.
Administrator LED codes
| Color | Activity | Meaning |
|---|---|---|
| Off | Off | Device not connected to power |
| White | Slow blink | Device not configured |
| Blue | Steady | Selected during configuration |
| Yellow | Slow blink | Loading machine configuration |
| Green | Steady | Configured and ready |
| Blue | Slow blink | Active with phone app |
| Green | Fast blink | Active; Start not pressed |
| Green | Slow blink | Busy; machine running |
| Red | Slow blink | Machine error |
| Red | Fast blink | Machine interface error |
| Blue/Green | Slow toggle | Firmware loading |
| Red | Steady | Firmware error |
User-card LED codes
| Color | Activity | Meaning |
|---|---|---|
| Off | Off | Waiting for card to be presented |
| Green | Slow blink | Card presented with funds |
| Yellow | Slow blink | Card presented with insufficient funds |
| Yellow | Slow blink | Loading machine configuration |
| Blue/Green | Slow toggle | Requesting card for update or vend |
| Red | Steady | Card is an admin or setup card, not a user card |
| Red | Slow blink | Card is corrupted or contains bad data |
Original installation sheet
Download INS. 2487-1 Rev B. The same PDF remains attached to this page.